USB Install Won’t Boot? Fix BIOS & Boot Settings

By Alex David Du · Updated
Alex writes about gaming, tech, and simple online income ideas, and builds projects that bring ideas to life.
Sometimes you do everything right, or at least you think you did, and your PC still refuses to boot from the USB. It either skips the drive and loads Windows, or worse, leaves you staring at a blank screen.
This is a common problem, and most of the time the USB itself isn’t the issue. The real causes are usually BIOS settings, the wrong boot mode, or mistakes made when creating the installer.
In this guide, I’ll show you the steps I use whenever a Windows USB won’t boot. By the end, you’ll know how to check your USB, adjust BIOS, and recreate the drive if needed.
Is Your USB Bootable?
Before changing BIOS settings, make sure the USB itself is bootable. If it wasn’t created correctly, your PC won’t recognize it no matter what you do.
Here’s what to check:
-
Test it on another PC
Plug the USB into a different computer and see if it shows up in the boot menu. If it does, the drive is fine and the issue is with BIOS. -
How the USB was created
Many problems come from using the wrong tool or settings. I use Rufus because it handles partition schemes, file systems, and ISO images the right way. If you haven’t made your installer this way yet, see my guide on how to install Windows 10 or 11 from USB using Rufus. -
File system format
Some PCs won’t boot from NTFS. FAT32 works on more systems, but very large ISOs may require NTFS. Rufus switches automatically if needed. -
Partition scheme
UEFI systems need GPT. Legacy BIOS systems need MBR. If these don’t match, your USB won’t appear as a boot option. -
USB port choice
Use a rear USB 2.0 port on the motherboard. Older systems often fail to boot from USB 3.0 or front-panel ports.
If the USB passes these checks and still won’t boot, the issue is likely in BIOS.
How to Access BIOS or UEFI

BIOS is where you control the boot order, but getting in can be tricky because every brand uses a different key.
Method 1: Use the BIOS key during startup
-
Shut down your computer.
-
Turn it back on.
-
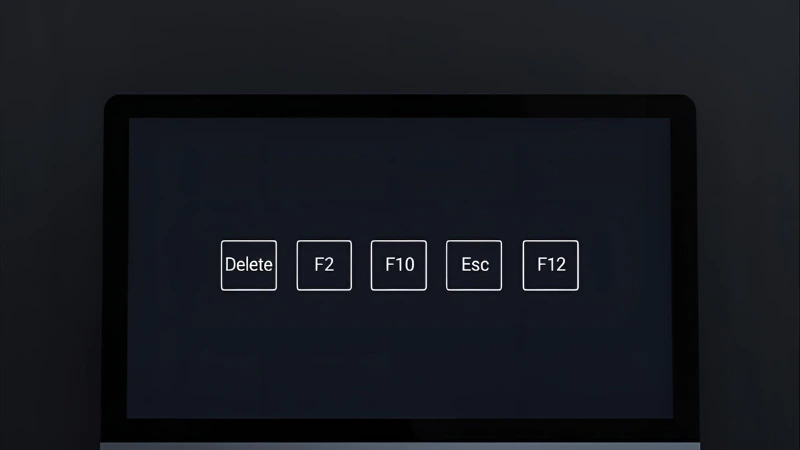
As soon as the screen lights up, start pressing one of these keys: Delete, F2, F10, Esc, or F12.
-
If Windows loads before you press the key, restart and try again a little earlier.
Method 2: Open BIOS from Windows
-
Go to Start → Settings → System → Recovery.
-
Under Advanced startup, click Restart now.
-
On the blue menu, choose Troubleshoot → Advanced options → UEFI Firmware Settings → Restart.
-
Your PC will reboot straight into BIOS.
If you’re not sure which key your brand uses, I’ve put together a guide with the common BIOS keys for Dell, ASUS, HP, Lenovo, MSI, and more. You can find it here: how to access BIOS on any PC with Windows 10 or 11.
Set USB as First Boot Device
Once you’re inside BIOS, you need to set the USB as the first boot device. If it’s not at the top of the list, your PC will load from the hard drive instead.
Here’s how to set it up:
-
Open the Boot tab or section in BIOS.
-
Find the list of boot devices. You should see your hard drive, maybe a DVD drive, and the USB stick.
-
Move the USB drive to the top of the list. Depending on your BIOS, you might drag it, or use the + and – keys, or Page Up and Page Down.
-
Save your changes before exiting. This is usually done with F10 or the Save and Exit option.
-
Restart your PC with the USB still plugged in. If the settings are correct, the Windows installer should load.
If the USB isn’t listed as a boot option, go back to Section 1 and make sure the drive is bootable.
Fix Secure Boot and Boot Mode (UEFI vs Legacy)
Even if your USB is set as the first boot device, BIOS may still block it because of Secure Boot or mismatched boot modes.
Secure Boot
Secure Boot only allows signed operating systems to load. That’s good for security, but it can stop your installer from working.
-
Go into BIOS and find the Secure Boot option.
-
If the USB isn’t recognized, turn Secure Boot off.
-
Save and restart, then try again.
-
After installation, you can turn Secure Boot back on.
UEFI vs Legacy Boot
Modern PCs use UEFI, while older ones run Legacy BIOS. The USB has to match the mode your system is set to.
-
For UEFI, create the USB with GPT as the partition scheme.
-
For Legacy BIOS, create it with MBR.
-
You can switch modes in BIOS under Boot or Compatibility settings, often labeled CSM (Compatibility Support Module).
If the modes don’t match, your USB won’t boot. Recreating it with the right settings usually solves the problem.
Recreate the USB (If All Else Fails)
If you’ve tried everything and the USB still won’t boot, it’s worth starting over. A corrupted ISO or a small mistake in the setup process can prevent the drive from working.
Here’s how to rebuild it:
-
Download a fresh Windows ISO directly from Microsoft.
-
Use Rufus to create the installer again, making sure to pick the right partition scheme (GPT for UEFI or MBR for legacy BIOS) and file system (FAT32 when possible).
-
Plug the USB into a rear USB 2.0 port on the motherboard.
-
Restart and try booting again.
Recreating the USB only takes a few minutes, and it often fixes stubborn issues that settings alone won’t solve.

